Showing posts with label Boss Klopz. Show all posts

Monday, July 26, 2010

Dirty Tactics: Transports


For 9/10ths of my Warhammer 40,000 gaming life, I have not used transports – only gone against them. This is because, sadly, I played Tyranids and Necrons, and never got to use transports. Transports were often used against me – but for the most part never seemed to get anywhere. I mean, at the end of the day, who WANTS to be closer to a Tyranid army?


So most armies I faced that used transports – not a big deal.


Then I started facing Imperial Guard and Tau, and players who used their transports tactically and aggressively, and I started to fear transports. Suddenly my opponent was blasting away at my bugs much sooner than I anticipated, and when I tried to get close to them, the transports would screen their troops. I probably had to waste a whole extra turn or two just to get at them.


For those who remember my Magic: The Gathering article, I described how a turn in Warhammer 40,000 is just about the most massively useful and powerful thing you can get.


If anything in Warhammer 40,000 allows you to effectively gain an extra turn on your opponent, it’s quite powerful – allowing you more options, and dealing more death, and reducing the impact of your enemy…


So when my opponents were cleverly using their transports to get extra turns on me – often costing me the game – I recognized just how strong a well-used transport can be.


Most of you who face Eldar opponents probably know at least 1 opponent who makes frequent use of transports. Transports are an amazing resource of the Eldar army, and, for the most part, are probably the strongest transports in the game. With the exception of the fact that they hover (thereby not blocking Line of Sight), Eldar transports can do everything that you want from a good transport:


- survivability

- firepower

- maneuverability

- is a tank


In truth, you probably want those things out of ANY vehicle – but the Eldar have access to many such vehicles, and at bargain prices. These 4 points about transports can each be expanded to show why you want them;


Survivability – This one should be dead obvious. If a transport can survive multiple turns, it can continue to have an impact on the game for multiple turns. If both the transport and unit survive, then after having a large impact at one point in the game, they can have a large impact AGAIN later in the game. By itself survivability is a good thing to have, but combine it with ANY other good thing about transports, and you have something great.


Firepower – This one may not be as obvious as it first appears. Any vehicle in Warhammer 40,000 wants firepower, but transports are one of the few vehicles that has to work hard to balance firepower with maneuverability. Too little firepower, and the vehicle has no function other than ferrying troops (so has next to no impact if the troops are killed). Too much firepower, and you will have to make poor decisions in whether to stay put and fire everything, or move to pick-up or drop off cargo when in truth you want to do BOTH.


Maneuverability – This must be balanced with firepower, but is an asset in any case. Fast, maneuverable vehicles with poor armour are often better than slow, pondering vehicles with lots of armour. A maneuverable vehicle can get itself (and its cargo) where you need to be, when you need to be there. It allows you freedom of tactical flexibility without requiring your strategy to force you down one road. If I’m playing an Ork army, and I have a battlewagon designed to get into the thick of things, and its bringing some boyz with it too – I have to choose between assaulting my opponent, or claiming the objective. I can’t do both, because the battlewagon simply isn’t fast enough to get into the enemy, and then get out again.


A Trukk, on the other hand (if it survives), can pick up a squad of boyz and drive them 18” in the blink of an eye.


Is a Tank – This is a yes/no style question. Some transports are tanks, and others are not. Being a tank and a transport is great, because it allows you to use tactical Tank Shock actions, and the vehicle is probably going to get close to your enemy anyways.


With all of these great things about transports, its not a wonder that of all the dirty tactics and actions that one can do in Warhammer 40,000, the dirtiest tactics of all can be accomplished with transports.


Dirty Tactic #1 – The Mobile Bunker
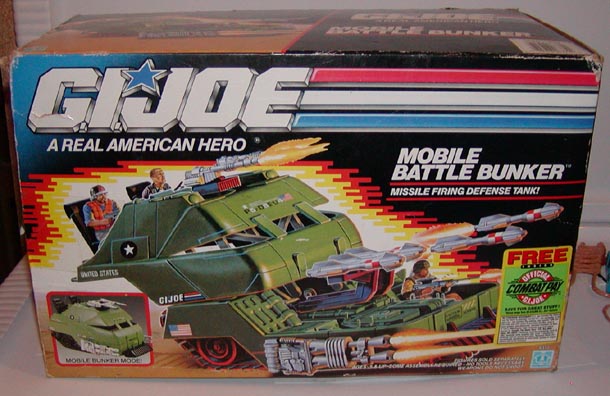


This tactic is one you probably already know (and if you don’t, shame on you). With the exception of a very few cases, when a vehicle is destroyed, it is not removed from the table but instead becomes a wreck. The wreck, like other terrain, will block line of sight, and provide a 4+ cover save. That’s literally like having a bunker plop down right in front of your troops.


The secret to this dirty tactic is to exploit the transport rules of where you can deploy from a wreck. Being open topped here is a great asset, allowing you to deploy anywhere around the transport. Place as many troops as you can fit within 2” of the wreck on the side opposite of the one facing the enemy. This will provide you with blocked line of sight from many enemy units (constraining your opponent’s options), and give you cover from the one or two that might see you (improving your survivability), and probably force any nearby assault squad to have to make a difficult terrain check to assault you (they may not reach, and you’ll strike first if they do).


This tactic will turn a loss into something quite less. Ork Trukks, and Space Marine Drop-Pods are AMAZING for this role – costing almost nothing, having guns and the ability to get right at your enemy fast, and altogether being worth far more than their standard points cost.


Dirty Tactic #2 – Whip-Around

This tactic effectively requires that you be open-topped and a fast vehicle. If you find yourself in a position where you don’t need to go very far to assault a unit, instead of just jumping out and charging, move to the back of the unit first and THEN charge.


In and of itself this won’t do much – but if the squad breaks and you don’t catch them, you’ll have a model within 6” of them (the transport) after they run, and so they won’t be able to regroup next turn.

If that doesn’t happen, you haven’t cost yourself anything, and may have even blocked shooting to your squad if they wipe out the defending squad just like in Dirty Tactic #1.


Dirty Tactic #3 – Pivoting Power


This one’s bad. You do this Dirty Tactic and people might not be happy with you, but it’s totally okay. When vehicles move, they are allowed to pivot as much as they want during that move. It also means that tanks can do a complete 180 degree turn on the spot at any point during the move… at the beginning, half-way through, or even at the end.


So, if you have troops in a transport, and you want to move them further but ALSO want to shoot with the transport as if you only moved 6”, then move the transport 6”, pivot 180 degrees, and deploy your troops, and move them up to the 2” maximum away from the access point.


Psychologically, when people are acting in Warhammer 40,000, they make shortcuts. One of those shortcuts is to assume that the back of a transport will stay at the back – so they might move things in a way that doesn’t keep the pivot rule in mind. As such, to them, it will seem like your troops have just moved 14” (6” move, 6” for the vehicle’s length, and then 2” from deployment from the access point). In truth, you’ve only moved 2” extra. If your troops – without the transport – were standing where the transport is, on your turn you could move them 6” up. The transport’s deployment from the access point grants an extra 2” for a total of 8”. BUT, your opponent sees the troops as standing at the back of the transport – a full 6” from where you would actually otherwise deploy them.


Effectively, all you’re doing with this tactic is punishing your opponent for making a mistake.


Also remember, you can’t RE-pivot after deploying the troops – but since you only moved 6” you CAN still shoot. That, and your troops may provide your vehicle with a cover save if they’re tall enough (most aren’t though).


Dirty Tactic #4 – An Objective Too Far


A downright obvious ability for any unit is to contest objectives, but a lot of people keep transports in the back of their mind. To most players, transports are part of a unit rather than a distinct and separate unit. For this reason, transports – especially speedy ones – make excellent objective contesters.


Once you’ve delivered your cargo, so long as your transport isn’t too threatening and stays out of reach of most guns, you’ll find that it will live much longer than it is supposed to. This is great for when the end comes, as the transport can fly in and stop an opponent from claiming an objective at a critical moment – even if there’s nothing in the vehicle.


If you DO have units still in the transport and you need to use them for this purpose, take advantage of every infantry unit’s ability to run. Blasting 12 inches, jumping out 2 inches, and then running up to 6 inches for a possible total of 20 is amazing.


DEBATE: Open Topped or Enclosed?


A big question with transports is if you want them open topped or not. Open topped is a big advantage in many ways. These vehicles can have their cargo jump out AND assault, can fire all their weapons from the vehicle (which makes it more like a mobile bunker), and has full 360 degree access and jump-out range. Take the Ork Battlewagon, for example. Normally, to do Dirty Tactic #3 (pivoting) you’d have to spin the Battlewagon around for the boyz to get out. However, since the Battlewagon is open topped, your infantry can disgorge out the front! Sure there are no access ramps there, sure it’s not iconic, but it is allowed. Also, that 360-jump-out means its very difficult to kill a squad that’s being forced to disembark, as they can disembark anywhere.


However, there’s a big risk that you take with open topped as well. You take a MASSIVE +1 penalty to the damage table. That means that, whereas other vehicles have only a 1 in 3 chance of being destroyed by a penetrating hit, you have a 1 in 2 chance. That’s a sizable leap. Also, on penetrating hits you are guaranteed to not be moving or shooting next turn – not just being unable to shoot. Finally, and most importantly, Glancing Hits can kill you! Sure it doesn’t happen often, but when it does it’s a big pain. That means that even a basic Tau Fire Warrior shooting his Pulse Rifle at your Armour 11, or that Chaos World-Eater that’s charging you (hitting your back armour of 10), are all major threats to the guys inside.


At the end of the day, it comes down to what you’re using the transport for. If the transport is there to ferry around a squad that’s there to hold objectives and shoot weapons, an enclosed transport is probably the best way to go. It’ll survive longer for when you need to relocate again, can protect its cargo better on the way there (or after drop-off using Tactic #1), and can tank-shock squads that don’t have an anti-tank weapon without fear.


If, however, you using it for transporting an assault squad, open-topped is by far the better option. The cheaper this transport is, the better, as it’ll save points on the rest of your army. Stay focused and remember that this transport is just a shield for the troops inside.

Monday, June 28, 2010

Cheating


Warhammer 40,000 is a game – and like all games, there will be those who will feel the need to cheat. In a game like Tic-Tac-Toe, it’s easy to spot a cheater, and easy to spot a mistake. If someone puts down an extra “O”, you’ll probably see them do it, and the symmetry of the game will be thrown off (there’ll be more “Os” than “Xs”, which is impossible).


However, as a game becomes more and more complex, and has deeper and deeper layers of play, cheating can become more and more difficult to spot and differentiate from making a mistake.


Take this classic cheating move:


Model A, the furthest up model in a squad, starts 13” away from an opposing squad. After moving, however, you find that he’s within 6” assault range. The model somehow was moved up 7” instead of 6”.


The Base Jumper:

Most Commonly: New Player

Reason for Cheating: Didn’t know – Stretching the Rules

Chances of Rehabilitation: Good


The Base Jumper measures the distance to move from the front of his base, but then moves the model up to that point so the back of the base touches. Nearly 1” is gained. The Base Jumper may not even realize that they cheated – they may be thinking of it as a clever way of bending the rules.


Corrective action must be taken immediately to teach them the correct method of measuring distances from models. Usually the Base Jumper learned this mistake from a friend. If someone more experienced is doing this, though, they are trying to exploit your unawareness to gain an advantage, and then it’s truly cheating. If they try to argue it, direct them to the rulebook, it actually shows a visual representation enforcing the correct way to move models.


Warhammer 40,000 is not a computer game. There is no system that forces a game state upon players. It’s not a Magic or Poker Tournament either, where a judge watches over everything and ensures that the proper game state is maintained should a blunder be made. No, at its core Warhammer 40,000 is a casual format where the players must be their own judges.


Which brings us our next villain…


The Rules Lawyer:

Most Commonly: Experienced Player

Reason for Cheating: Win by a thousand pin-pricks

Chances of Rehabilitation: Moderate, Good with group support


The Rules Lawyer is a gamer who seems to know every rule, backwards and forwards. They despise taking out the actual book, and claim that the rules support all of their actions, and then take a fine-tooth comb to everything that you do and argue the same thing back. A great example would be Line of Sight. They’ll argue to death that the current “any part of the model is visible” rule means, for them, that they can effectively shoot your entire army – and yet at the same time will flat out deny and force a “Hand of Fate” roll to see if practically anything you have can see him – and if you can, you can bet he’ll push for 3+ and 4+ cover saves as much as possible, while you’ll get 4+ and 5+ saves in return. The rules lawyer is kind of like the Joker – he forces you to have to become something you’re not, a rules expert. However, there’s another way out. Become part of a larger gaming group that supports the actions and rules you want to take. Since Warhammer is a casual format, house-rules are a great way to settle situations that you might find odd or out of place (myself, I still love Area Terrain, since the board – to me – is simply a representation of the game state, and can never perfectly depict how the terrain really looks).


So how do you identify the cheater? It’s very difficult in Warhammer – in part because a lot of this game is occurring simultaneously, your attention may be diverted, and you may not remember the rule that’s being broken.


With cheaters, it’s like playing a game of ball-and-cups. If you miss their move for a moment, they can pull a fast one on you. I guess this is a good time to bring up the most common of all cheaters…


The Dice Master:

Most Commonly: Anyone

Reason for Cheating: Tactical Advantage

Chances of Rehabilitation: Low


The Dice Master is perhaps one of the most nefarious of all the Villains. The Dice Master is a true illusionist. While your attention is focused elsewhere, they will pull a fast one, and before you know it – a losing dice roll is now a winning dice roll. Most often this is when the opponent’s back is turned during a die roll, and they’ll just shift the die so that it succeeds rather than fails. They may also pick up failed rolls when a lot of dice are rolled, preferring to roll next to additional dice already on the table to effectively gain more rolls. The worst ones, and the ones easiest to spot, are the ones who roll a bunch of dice, and then effectively “hide” the results by scooping them up faster than you can really see them, or who roll behind something so that you can’t see how much was rolled. The only way to defeat the Dice Master is to be vigilant at all times – but you can still be friendly when doing this. Stand beside them, enjoy the excitement of the dice-rolls, and make sure they’re always present for YOUR rolls so that you create the atmosphere that EVERYONE must be present for ALL rolls.


The crux of stopping all cheating though, is to nip it at its bud. Don’t let it slide. Create a gaming atmosphere where cheating simply isn’t tolerated. If the Rules Lawyer is creating a problem, get the whole group to enforce some simple house rules. Having someone who really knows the rules truly very well is excellent to have – but don’t be afraid to deviate from the book if you want! My group allows you to ask what a squad is carrying, and motivates people to openly acknowledge confusing conversions or proxies before a game starts without prompting. At the same time, I know another group that is the polar opposite to this – keeping all information hidden at all times. Neither is truly right or wrong, but neither group would appreciate the pressures the other puts on them (one side thinking its unfair to give the opponent more information than they would actually have, and the other thinking it unfair NOT to give the information on something to avoid cheating).


Oh… one final Villain…


The Pariah:

Most Commonly: Unknown

Reason for Cheating: Extreme Ambition and Lack of Morality

Rehabilitation: Pariah status if ever caught


The Pariah brings the worst form of cheating imaginable in a dice game – tampering with the dice to make them rigged. There do exists methods for doing this – from weighing dice (drill holes in the side opposite of the one you want to land, fill with lead, paint overtop) to misshaping them (heard a rumour of melting them in a microwave or oven to just barely make them slightly rectangular). You can tell a Pariah by the fact that they reserve special “lucky dice”, that they never use any dice but their own, and never offer to let you use the lucky dice. Proving it is a different matter, and one I’ve thankfully never had to do.


If you catch the Pariah, denote them the Pariah status and never game with them again. Teach them that cheating this bad is the lowest a person can go (most effort to cheat, high effect, impossible that they did it by accident, hard to catch them again in the future, most likely to use rigged objects in other games). If you ever do find this villain, punch them in the face for me.


Hope this helps you identify future villains!


(PS. Note, I do run a Dirty Tactics article. Dirty Tactics might not win you any friends, but they are completely legal actions that do not even stretch the rules. What they do allow, however, are actions for best effect that, although perhaps not realistic, are 100% legal and highly effective.)

Wednesday, June 16, 2010

Risk and Reward

Warhammer 40,000 is, largely, a game about risk management. Whenever you do something, you take a chance. On the one hand, you might succeed – on the other hand, you might fail. Chance is a fickle thing, and no matter HOW much probability study you put into it, at the end of the day, you still have to roll those dice. Sure, 91 times out of 100 you’ll succeed – but there’ll still be those 9 times that you’ll fail. This roll, this crucial roll, may be one of those times.

Then again, it may not.


The point is; you truly don’t know until you try.


Some people will claim that this completely dismisses any argument for probability studies. They say that you can’t arm-chair general a game and know from the numbers what the outcome will be. But that isn’t quite fair either – as you do know that, most of the time, a certain situation will yield a certain result. Usually, when a squad of 10 Orks charges a squad of 10 Marines, the Orks will win. If I can assume that the Orks do get into combat, at roughly that level of strength, I can assume the outcome.


But this only works for the short-run, only for stuff that’s happening, effectively, “right now”.

And “right now” for me was a decision I faced in a recent game against the Imperial Guard. (for the record, I tied the game)


Hopeless odds – a 5-man Sternguard Squad with a Chaplin, an empty Razorback with twin-link Lascannon, an Immobilized Rhino, and a Force Commander who already used up his Orbital Strike. A total of 9 models, worth roughly 500 points – most of it in 2 models.


At the board edge, a corner of the table, are 3 Armoured Fist squads in their Chimeras, one squad of an Infantry Platoon, and a Leman Russ Demolisher. I had, rather ineffectually the turn before, merely forced one Chimera and its payload to not be able to shoot this turn.


Being pinned in placed, and with time rapidly running out where the Imperial Guard could try to steal my objective in an attempt to win the game, the Guard had to move up the table – and the easiest and safest route… Tank-Shocking through my Sternguard Veterans.


Being accompanied by the Chaplin, they automatically passed their Ld test, and I had an option. I could get out of the way, or I could attempt a Death or Glory attack with my weakly S6 Krak Grenade against the fiendishly resilient Armour 12 of the Chimera. At the end of the game, we both agreed that this decision was the most important one of the game.


Most of a game of Warhammer 40,000 can be played rather simply. Unit 1 engages unit 2 because unit 1 has an excellent chance of defeating unit 2. Unit 3 could spend a turn shooting, but since it doesn’t have a very good chance of doing anything, it runs to get to a better position instead. Often at least once in a game though, you’ll be presented with a difficult decision – take the safe route that will keep you in an okay position regardless of the outcome, or take the chance that, while slim, may change everything.


I’ve mentioned the term “impact” briefly in the past. Impact, I said, is how much a certain action’s consequences will affect the game.


For example, you have an option to shoot at an enemy Heavy Support, or an enemy Troop. If it’s the beginning of the game, you’ll probably be shooting the Heavy Support. If it’s the end of the game, you’ll probably be shooting the Troop. Why? Because at the beginning of the game, removing your opponent’s Heavy Support will reduce the amount of damage that army can deal to you, whereas at the end of the game, when the Heavy Support may only be able to shoot at you once more, stopping your opponent’s troops from capturing objectives or contesting them will ensure your overall victory.


In this sense, at the beginning of the game, shooting the Heavy Support will have higher Impact, whereas shooting the Troops will have immensely higher Impact at the end of the game.

Unfortunately, as of yet, I can’t tell you a sure-fire way to determine Impact – it’s just not quantifiable. Judging points-value to points-value is a good start, but ultimately it will be the unique situation that you find yourself in that will determine the answer.


Instead, let me present you with a simple scale. Judging things by this scale can help put things into perspective so that you can make the best decision possible.


IMPACT:


1 – Very low Impact. Taking this option will result in almost no change to the game and won’t force your opponent to do things any differently.


Ex. Having a lascannon kill a single model in an opposing squad of Troops that are at full-strength, and the Troops are not being overly threatening.


2 – Low Impact. This option will marginally reduce your opponent’s strength, but not their options. In the end, your opponent’s impact against you is largely untouched, but their odds of successfully impacting you are reduced.


Ex. Shooting an Ordnance round into a 3-man squad of Devastators, the Devastators are in heavy cover (4+ cover save), and it’s Turn 4.


3 – Medium Impact. This option will either significantly reduce your opponent’s strength, or will marginally reduce their strength but will also reduce their options.


Ex. Attempting to destroy a transport that’s 1 move away from assaulting your valuable units. Chances are the unit will lose some strength, not too much, but will force your opponent to slug their way across the table, slowing them down and forcing their hand.


OR


Ex. Attempting to annihilate a Troop squad in the early game by either destroying them completely, or bringing them under 50% strength and trying to get them to fail a Ld test.


4 – High Impact. This option will almost definitely annihilate an opposing unit, and/or will put you more in control of the game by removing some of your opponent’s options. Your opponent will feel hurt after this.


Ex. Destroying your enemy’s HQ. Stopping their Troops from claiming an objective right at the end of the game. Taking out multiple units with a well-placed charge. These are all good ways to cause no end of grief for your opponents.


5 – Game-Changing Impact. This option, if successful, will change the face of the game. Not only will it destroy something that’s bugging you, but it will throw a wrench into everything that your opponent is trying to do. If you can achieve this level of impact at the beginning of the game, the game is almost as good as won.


Ex. Destroying a Tyranid player’s only Synapse creature within range of most of their army. Taking out the crucial Necron Monolith at the beginning of the game, preventing the Necron Army from gaining access to multiple “We’ll Be Back” saves. Causing your opponent’s only 2 Troop units to fall back off the table, preventing them from ever winning the game.


Preferably you want to be achieving as high Impact as possible as much of the time as possible. However, it’s not that simple – you still have that pesky problem named “chance”. Even if every Lascannon on the table turns its sights on the Monolith on turn 1, you still probably won’t take it out, and glancing it does almost nothing (1 in 6 chance of Immobilization, every other roll is effectively pointless against the Monolith).


Enemy Hive Tyrants have lots of wounds, and are often guarded by yet more gribbly creatures to absorb the blows.


Lots of Troops at the beginning of the game will be in range of Ld-modifying bonuses, or won’t even be close enough to the table edge to force them out of the game even early on.


The point is low Impact actions are often easier to achieve than high Impact actions.


And there you have your basics of risk;


High % chance that you can weakly influence your opponent.

Low % chance that you can massively influence your opponent.


If you attempt the low impact action, even if you fail, your failure won’t lie heavily on you. If you attempt a high impact action though, if you fail the consequences can be pretty bad.


So, at what point is the risk worth the potential reward?


This is what was going through my mind during the game. I had a choice – I could move clear of the tank-shocking vehicle. If I did, my opponent would have free rein of the board. They wouldn’t outright destroy my units, but they could do a lot of damage and I’d have to scramble to deal with the approaching forces.


Or, I could Death or Glory with a S6 Krak Grenade against Armour 12. I knew I would automatically hit, thanks to the Death or Glory special rules, but those same rules would force me to hit the front armour – not the back. So a 1 in 6 chance of even just a glancing hit.


Even if I got that hit, I would still need to roll either a 4 OR a 6 to stop it (a result of 5 would merely result in a destroyed weapon and the tank would continue rumbling forward).


Total % chance of success – not good (that’s all I needed to know – checking the math now, I see that I had a 5.6% chance actually – or 1 in 18).


If I failed, which was likely, I would not only have done nothing, but additionally LOST a 25 point model of a very effective squad, setting me even further behind than if I just took the safe route and stepped around the vehicle.


But if I succeeded…

Then my opponent would be boxed in. From the position I was in, if it succeeded, my Sternguard would be protected from most shooting for the turn. Furthermore, my enemy would have to bring their Chimera’s often difficult terrain to move forward. Anyone who plays with or against Mechanized Imperial Guard will know that Chimera Congestion is a problem that even “Reactin” won’t solve.


I probably spent a full 2 minutes judging what to do. In the end, I figured that it was worth the risk, and I took the option. And what do you know? Today just happened to be that 1 time after 17 failures that I succeeded.


The effect was pretty devastating to my opponent. I would rate it a 4 on the Impact scale, maybe 4.5. It wasn’t game-winning, but it certainly was game-changing. I didn’t deal a lot of damage, but in one move I had boxed my opponent in, giving my vastly inferior force (9 models remember) a chance against some 44 models (40 Guardsmen, some with special or heavy weapons, 3 Chimeras, and a Leman Russ Exterminator).


I didn’t destroy all my opponent’s forces in that area, but I stopped all by 1 Chimera and its squad of Guardsmen from reaching the objective, and then the Chaplin (still alive) proceeded to annihilate them. By keeping my opponent off my objective, I was able to turn a losing game in a draw.


How would things have turned out if they happened differently? I can only guess that the Sternguard would have faced a quicky, flamer-filled death, followed by the Chaplin bitting the dust from multiple lascannons to the face, and then having to use what was left of my Troops to fight off some 30 Guardsmen and tank. But… we’ll never know now.


So, try to judge your risk and rewards. It’s not always the right choice to take the safe route – sometimes you have to throw caution to the wind, because IF you succeed, the impact of that action will change everything.

Tuesday, May 11, 2010

Building Your Army List

Boyz before Toyz.


That sentence sums up all that is Ork about an army list. Boyz before Toyz says, “You need a strong presence of troops before you start putting points into more fancy stuff. Ork Boyz are strong infantry, but can be whittled down easily. You need enough of them to not only have an impact late-game, but also to capture objectives.”


That’s a lot of words summed up by Boyz before Toyz.


Army building is one of the most important tasks in the game, and you have to make a load of strategic decisions often before you even know who you’re playing against. As such, a lot of people really stress about their “lists”. Frankly, they’re worried it’s simply not good enough. Players go far and wide to seek approval for their lists. They go to friends, the internet, and tactical articles like this.


What you have to remember first is that no list is perfect. The game is designed and balanced so thoroughly that for every power-list out there, there is at least an equally powerful list somewhere else that also has the added bonus of trouncing the first one.


For example, an army of all tanks with ordnance (like 6 Demolishers in a 1000 point teams match) should be great against another force that takes just a few elite anti-troop killers (like Grey Knights that have eschewed heavy weapons for stronger close combat), but will do very poorly against a huge Ork Troops force backed by some Kustom Force Fields (can’t kill enough boyz, and once they get into close combat, they’re hitting the rear armour).


In my experience, designing an “all-comers” list with some kind of specialization is often the best way to go for a tournament. An all-comers list has a lot of power to it, mostly because so many people undervalue the effectiveness of well-placed Troop choices. The basic troop of almost any force in the game is a powerful unit for very little points – but they simply don’t have the bells and whistles that draw people to the more advanced stuff. As mentioned in a previous article, a Space Marine Tactical Squad is a DEAL for 10 models (offering you 10 tough-as-nails units with a special weapon, heavy weapon, a sergeant for close combat, and the ability to split them into 2 dedicated squads).


However, even with lots of troops, you shouldn’t forget some of those bells and whistles because, in the right environment, they will do amazing stuff. An Assault Squad is useless if it’s engaging a Dreadnaught (assuming the squad has no power fist), but shines brilliantly when assaulting enemy light infantry and ranged specialists. If you take 3 squads of them, you likely won’t see them all performing at their best, since you’ll need them in different spots on the board. If you take just 1 squad, you can set it on a goal right at the start of the game, and it will almost assuredly complete that task. That’s the strength of taking just 1 of something (but you probably want a second one, or another with the same goal that does it a little differently).


If, by some chance, you DO know who you’ll be fighting, or you at least have a good idea of the people/forces that will be playing, don’t be afraid to “meta-game”. Meta-gaming is something I’ll cover in the future. To put it shortly, if you know for a fact that people in your area play with lots of tanks, put in more tank-killers. If you know for a fact that people in your area bring lots of Spearhead units to tournaments in the form of beefed up characters and Monstrous Creatures, bring character and monstrous creature killers.


So, when building an army list, keep in mind each unit’s goal. In general, static units should only ever be given one or two goals, whereas dedicated assault units or very mobile units can be given 3 goals. The only exceptions to this are static units that are truly able to handle 3 different types of goals (an Imperial Guard Leman Russ Battle Tank can contest an objective, and blast light or heavy infantry apart at the same time), or dedicated assault units that are likely to die too swiftly and should never be given more than 1 goal (Tyranid Hormagaunts die too quickly to assign anything other than being disruptive or taking out light infantry, but they do that one task very well).

Here’s a list of goals to consider assigning to your units


  • Character & Monstrous Creature Assassination
  • CC Anti-Heavy Vehicle (Land Raider, Falcon Grav-Tank, Ork Battlewagon, etc.)
  • CC Anti-Light Vehicle (Ork Trukk, IG Sentinels, Tau Devilfish, etc.)
  • Ranged Anti-Heavy Vehicle
  • Ranged Anti-Light Vehicle
  • CC Anti-Infantry
  • CC Anti-Heavy Infantry
  • Ranged Anti-Infantry
  • Ranged Anti-Heavy Infantry
  • Contesting Objectives
  • Claiming Objectives
  • Outflanking
  • Infantry Support
  • Tank Support
  • Spearhead (often anti-anything, like a Daemon Prince, but never a Troop)
  • Disruption


So, for example, consider this small army:


---------------------------------------------


HQ: Ork Big Mek w/Shokk Attack Gun, Heavy Armour, and Cybork Body


Elites: Kommandos w/ 2 Skorchas


Troops: 2x 20 Ork Boyz, w/Shootas and Nob w/Power Klaw and Boss Pole


Fast Attack: Warbuggie w/Twin-linked Rokkit Launcha


----------------------------------------------


This small army probably costs around 500 points, and has 5 units. The Big Mek is designed for Anti-Heavy Infantry and Anti-Light Vehicle. He’s a standalone model that is meant to quickly deal with any major threat first-turn. Some people would call this unit a Spearhead unit, as it “can” deal with anything. However, especially in the case of the Shokk Attack Gun, “can” doesn’t necessarily mean “will”. The most common roll is a S7, AP2 large blast – great for dealing with Heavy Infantry, and able to stand up to a light vehicle – but woefully inadequate for heavy tanks. Even at lower strengths it’s good against heavy infantry, and it’s useful against light vehicles a little over 50% of the time.


The Kommandos are Outflankers, Anti-Infantry, and Anti-Heavy Infantry (thanks to the Skorchas that can also act as Power-Weapons).


The Boyz are for Claiming Objectives and CC Anti-Infantry. Their Power Klaw enables them to do more though, as they could run into almost anything as they make their way to the objective. The Bosspoles will help keep the squads in the fight if their numbers get low.


Finally, the Warbuggie is for Anti-Light Vehicle and Outflanking. It does not have the Outflank special rule, but its speed allows it to engage almost any enemy quickly, and the twin-linked Rokkits help it deal with problem enemies with consistency.


Thus, this army has the following capabilities:


Ranged Anti-Heavy Infantry (x1)

Ranged Anti-Light Vehicle (x2)

CC Anti-Infantry (x3)

Outflanking (x2)

CC Anti-Heavy Infantry (x1)


Notice the curve-pattern. The army has a specialty, close-combat anti-infantry. This is what this army is best at (pretty common for Orks). The army is also somewhat adept at dealing with light-vehicles (like enemy transports), and can get into some advantageous positions with its Outflankers. Finally, the army has the ability to deal with Heavy Infantry, both at range, or up close. For 500 points, that’s a really well-rounded army, with a troop-killing specialty.


However, the army lacks the ability to easily deal with Characters/Monstrous Creatures, Heavy Tanks, a Spearhead unit, and has no way of supporting its troops or vehicle to make them better. These flaws could be exploited by any army in the game, from a Tau Hammerhead, to a Tyranid Carnifex, to a Terminator Assault Squad (okay, I don’t know if you’d see that in a 500 point match).


When you design your army, you’ll also have to choose between a top-down and a bottom-up design. Do you design for a specialty first, then build around that, or do you take the cool stuff you want first, then see what needs to be tweaked after? The above list was top-down, starting with wanting a Big Mek with Shokk Attack Gun and Burna Boyz for some Heavy-Infantry killing power, and then putting in the troops and a Warbuggie to round the list out.


Choosing your army is a very difficult strategic decision, and there’s SO much more that we can go into! Hopefully this helpful hint will aid you in designing winning lists in the future!

Monday, April 19, 2010

Strategies, Tactics, and What They Mean.


"Seeing the forest from the trees," "getting the big picture," and "sensing the flow of the game," are all ways that we describe the concept of prioritizing strategy and tactics. However, many players don't see or understand this concept, and many fail to even understand the differences between them


I once saw an article on the internet for Warhammer 40,000 titled “Why tactics are useless in Warhammer,” and I was really stunned that someone would say this. I think what the person was meaning to say is that strategy is useless, since the game requires a strong use of tactics. But even then, I believe that the person was wrong, as there are many strategic components to the game – but most of these decisions are made before the game even begins.


Sun Tzu wrote in the Art of War:


"Strategy without tactics is the slowest route to victory. Tactics without strategy is the noise before defeat."


This is especially true for Warhammer, although the structure is somewhat reversed. It is possible to win a game of Warhammer with tactics alone, but without strategy you’re only half-way to victory. Conversely, having a strategy in Warhammer is great, but without tactics to back you up, you’re doomed to fail.


The reason behind this is simple. In Warhammer, you win any match so long as you wipe your opponent out (a Massacre result) before the game ends. Regardless of any other objective, a wiped-out opponent loses, and you win. I recently won a game this way – a special scenario where only HQ units could score killpoints. At the end, with my HQ that had scored kill-points dead, I had 0 points. However, I had wiped my opponent out. If he had even 1 unit of grots left (who couldn’t even score points), we’d have tied – but since he was wiped out, I won.


So what do I mean by strategy, and what do I mean by tactics?


In marketing, the terms are very rigidly defined. Quickly put, tactics are things you do to improve your business that are short-term (within the span of 1 year). These are things like hiring/firing, discounting old merchandise, and picking out the right Christmas merchandise before the season hits.


Strategies, on the other hand, are things that you do to improve your business that are long-term (span of greater than 1 year). These are things like trying to change customer’s perceptions of your store/brand, modifying the customer experience, or creating an online sales department.


The same concept of strategy and tactics apply in Warhammer, but we’re not dealing with massive time-frames. Tactics are still short-term decisions, and strategies are still long-term.


How short-term, and how long-term though?


Tactics:


Tactics in 40k are the small decisions that you make throughout the game. They are your unit by unit, turn by turn, choices. How far will you move? What will you shoot? Will you assault or not? How will you disembark from your transport? Do you risk immobilizing your vehicle going through the difficult terrain, or risk losing your cover save when the enemy comes into a firing position next turn? These are all examples of tactics.


Tactics are extremely important in Warhammer. If you make the incorrect small decisions, you can’t hope to fulfill your strategy (the basics of which likely are; "win games"). If you’re assaulting Wraithlords with your woefully under-equipped HQ, you’re likely making the wrong tactical decision. But some tactical decisions are more difficult than this. A classic question is when you have to choose to either assault one, two, three, or no units!


This problem occurs more for horde armies than for elite ones (Tyranids, Orks), but can also apply to a mostly unmolested squad of Blood Angels, Howling Banshees, Kroot, or other 8+ model assault squads. The problem that tends to come up is this; you’re close to the enemy’s big bad assault character/unit (Killa Kanz, Wraithlord, Dreadnaught, Demon Prince, etc.). If you stay where you are, you’re likely going to die, if not from the enemy’s firepower, from the inevitable assault. If you assault, though, there’s another assault unit close by, and they can counter-charge you. If you assault, you may even kill off the unit that you’re assault, and then the enemy guns and other assault unit will definitely destroy you. Finally, there’s a third squad close by that you can double-charge and, while not an assault squad, stands to do some major damage to other parts of your army if it gets away.


This is a complicated tactical scenario. No answer seems to be the right one. Assaulting nothing is bad, assaulting one is also bad, and assaulting two enemies means that you’re basically sacrificing your squad. The correct answer will depend a lot on both the rest of you’re army’s position, and on your strategy. It’s one turn, one choice, but that tactical decision could have far-reaching implications.


Strategies:


Then there’s your strategy, which are the long-term decisions that you make, and which can influence your chances at winning not just one game, but in all your games with that army. A strategy can be as small as “In this game I need to capture the objective and then just survive,” to “I’ve collected my army based on the concept of dealing significant ordnance damage to the enemy, and then finishing them off with assault and flamer squads". Strategies are not individual choices, but is a philosophy that helps to direct or view future tactical decisions. You may want to charge the nearest enemy, and that may give you the best damage/loss ratio, but if you know the game's going to end soon you may need to charge that unit that you have no hope of defeating simply to stop them from getting to the objective.


It is nearly impossible not to have a strategy. A strategy can be as simple as “win this game”.


Strategies are merely philosophies that guide the rest of your decisions. It is possible not to play to win. GW employees learn to give intro-games, which are played with the strategy of presenting the game in the most favourable light to that player (players may like the models, the story, the rules, the competition, etc.). If I encounter a new player, I play to teach them the rules – so I might make decisions that, although not correct for the “win this game” strategy, do help the “teach the rules” strategy.


However, having a better defined strategy, or multiple levels of strategy, can greatly benefit you. Some levels are; army choice, army collection, tournament army lists, single-game army lists, size of game, play style, and placing terrain.


The most common time that players decide on strategies is when putting together an army list. Since I see Warhammer as a strategy game, a game that I try to win, I like to collect larger armies. A larger army allows me more strategic decisions when constructing an army list, since I can change my army list from game to game. One game I may use a strategy of lots of models, and another game I may use a strategy of fast vehicles. Making the strategic decision to collect a large army allows me choices for what strategies I will be able to execute later.


Remember these differences, because your understanding of Warhammer 40,000 and how to win it require that you know the difference!