Wednesday, August 4, 2010

Learning Starcraft 2


When I first played Starcraft back in 1998, I was enthralled. The game had so much to offer – probably too much for a 12-year-old. Intricate story and great game-play, these were the things I came to expect from Blizzard Entertainment.


However, I was scared off from the multiplayer side of it. I had known from experience that my multiplayer skills weren’t that good – and I had an extremely hard time even against the computer. The concept of using unit combos was nearly alien to me.


Don’t get me wrong – I knew of combos. Zerglings and Hydras, Marines and Siege Tanks, Carriers and Arbiters… but I just didn’t really execute them. For my 12-year-old brain, it was too much info to handle. Instead, I was focused on setting up fun traps for my opponents to stumble into. Build Zerglings and Hydras, burrow them in front of my base, then pop them up – endless fun.


Still, it wasn’t right.


I was ignoring a big part of the game – economy. In 1 on 1 matchups, this cost me more games than I can count. I simply couldn’t keep up with my opponents. Even in Warcraft 2, my economy always lagged behind. My cousins would build massive Ogre and Paladin armies, more than twice the size of mine. Though they had the economy advantage, which would eventually wear me down and destroy me, I did have a unit micro advantage. Whereas they would throw their units into the fray, then return to expanding their economies, I would keep in the fight, and heal my Paladins as they took damage, making my fighting force count for more than its worth.


But I wouldn’t win. At best, I would just delay the inevitable.


My strength in Starcraft, but only in multiplayer maps, was my ability to harvest lots of resources WITHOUT spending them, and then after nearly being wiped-out, returning from the grave and suddenly building a huge force out of the Zerg’s self-replicating system. With 8000 minerals saved up, and lots of gas, I could spawn half a dozen or so Hatcheries, then suddenly mass a huge force of Hydralisks.


This wasn’t a good strategy though. I was making the best out of my weakness, not making the best out of real strengths.
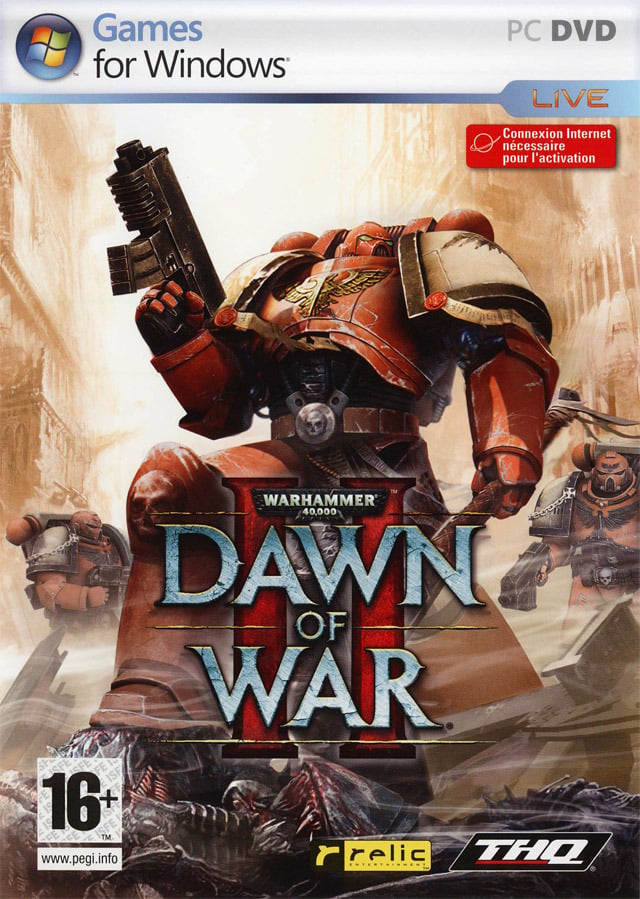

Thankfully – over the years I’ve played much more in other games, and discovered I have a hearty appetite for carnage. I would discover things like unchecked expansions through some games, and sudden rushes in others. Supreme Commander was a good lesson in learning that the might of an economy alone can win games, but Dawn of War taught that one needed to pay attention to your individual combats as well.


Now, with the return of Starcraft, in all its glory (it really is a beautifully crafted game – Blizzard’s best so far), I have been tried through fire, ready to be forged on the anvil of war. I now have the skills to manage my economy, the confidence to attack early, and the precision to manage my combats. All of these skills still require much fine-tuning still, but I am ready – which is what’s important.


At this point, I’ve come to understand a very important issue in Starcraft 2 – Scouting & Unit Combos. You can’t have one without the other. Scouting is vitally important in Starcraft 2 because of the existence of “hard-counters”. In Magic, a hard-counter is a card that just says “counter target spell”. It doesn’t give your opponent any leg-room to escape. This is opposed to a “soft-counter”, where your opponent is restricted, but has an option, or the counterspell is only effective some of the time (like they can avoid it by spending mana, or the spell has restrictions on what it can target).


Starcraft 2 has hard and soft counters in the game. For example, Hellions vs Marines = Hard Counter. The Marines have light armour and are small units that gather in groups. The Hellion has an attack that deals bonus damage to light armour and has an attack that can hit multiple units in a group. Point for point, Hellions will beat Marines (though you need to micro-manage a bit to get the most out of the splash damage).


Another example would be Zealots vs Zerglings = Soft Counter. Zealots can massacre Zerglings because the Zealots have high damage output, high health, and fast attacks. So long as they can avoid being surrounded, the Zealots will win out. They don’t have any bonuses against Zerglings, but their statistics and the way they deal damage helps them win.


This is why Scouting is important in Starcraft 2. This is why combos are important in Starcraft 2. It’s not a combo of “these 2 things are strong together” but rather “these 2 things are strong against a set of units your opponents have”.


I just had a placement match yesterday where my opponent was massing Marines. Tons of Marines. Probably had a good 24 Marines. You know what works great against Marines? Banelings. It’s simply stunning. Once I shot a few Banelings at him, Hydralisks (which can also chew through Marines) were able to come in and claim the day. Because I knew what he was building, I was able to switch tactics and starting producing a hard-counter.


Same goes for another match against a fellow named JP. He was playing Terrans and had a good defense going with Marines in Bunkers supported by Siege Tanks. That’s tough to break into, regardless of what race you are. That is, it would be hard if you tried to fight him on his terms. Thankfully, every race in Starcraft 2 has something for every situation. In my case, after seeing that he had a lack of any Missile Turrets, I started building Dark Templar – something I was already planning on doing. The Dark Templar were able to bypass all of his defenses and tear apart his economy.


He was able to build stuff in response, but the cost to his economy was massive. From that point on, victory was all but assured. A second attack by Dark Templar finished things by taking out the Command Centre, leaving him without any way to collect minerals and sealing the deal.


Let’s assume, however, that he had built missile turrets. What could I have done then? Considering he was harvesting from just 1 base and I was harvesting from 2 (and soon 3 and 4), I could just try to hold him off from accessing another base – draining him of resources. In the meantime, I could build up a cliff-walking force of Collossi, perhaps supported with a Phase Prism to transport a force directly into his base, blast through an undefended destructible rock-face to strike from behind, or even gone the route of Mothership and Carriers for absolute bunker-blasting capability.


Okay, stepping back for a moment. The possibilities in Starcraft 2 allow for a dangerous game – Theory-craft. On the one hand, you need to know your options for a given situation. On the other hand, for every action you make, they can likely make at least 2 counters to that action. That’s what makes Starcraft 2 great – you always can do something else. It will cost you time, which is a precious, precious resource in Starcraft 2, but you can do it – likely by just building 1 more structure.


This is why scouting is important. If I know my opponent’s forces, I can craft a force to beat his. If he doesn’t know what force I’m crafting to beat his, I have the advantage. If he does know what force I’m crafting to beat his, he’ll be at the advantage. It’s Rock/Paper/Scissors with the chance to cheat. I prepare Rock, they spy on me and prepare Paper, but I see that they spy on me and/or I spy on them making Paper, so I switch from Rock to Scissors, but they…


So, before I go, let me present to you a small list of hard-counters. These are just what I’ve found so far, so don’t go overboard with them or consider them cannon at all.


Counter-Unit vs. Unit that gets Countered


Banelings vs Marines

Dark Templar vs Anyone Without Detectors

Marauders vs Roaches

Immortals vs Anything armoured (would also have been an option in my match against JP)

Void Ray vs Structures and Terran/Protoss Fliers

Reapers vs Worker Lines


About that last one – it’s mean. You honestly just need 1 or 2 Reapers to make a run on someone’s worker line. Not only will you inflict some real economic damage, but you’ll force your opponent to beef up defense on their worker-line, wasting their money on purely defense units or structures, and shifting them away from expansions and army-building.


Take care folks! Catch you next week!


Side Note: I've been playing the Ranking Matches. So far I'm 3 for 0. Go ahead and see my progress thus far! (add me as a friend through battlenet - if you already know my email, if you don't, leave a message below with your email and I'll consider adding you)


Battlenet let's you check up on your friends' progress in the game. While they're connected, you can see if they're currently playing a game, waiting for a game to start, or just waiting around for something to happen.


It also allows you to see how they've earned their current score. Checking mine, you'll notice that I've completed the Wings of Liberty campaign, have built 21 Zerglings at once, have had a 3-victory hotstreak at some point during my gaming career, and have completed the Terran Basic Challenge at Gold Level (unfortunately, the others are just at Silver at the moment).


I find this really "neat", as it can allow you to chat with your friends about things they've already accomplished, or see how far they've gotten through the game so you don't spill any spoilers.


Hope to see you online!

Monday, July 26, 2010

Dirty Tactics: Transports


For 9/10ths of my Warhammer 40,000 gaming life, I have not used transports – only gone against them. This is because, sadly, I played Tyranids and Necrons, and never got to use transports. Transports were often used against me – but for the most part never seemed to get anywhere. I mean, at the end of the day, who WANTS to be closer to a Tyranid army?


So most armies I faced that used transports – not a big deal.


Then I started facing Imperial Guard and Tau, and players who used their transports tactically and aggressively, and I started to fear transports. Suddenly my opponent was blasting away at my bugs much sooner than I anticipated, and when I tried to get close to them, the transports would screen their troops. I probably had to waste a whole extra turn or two just to get at them.


For those who remember my Magic: The Gathering article, I described how a turn in Warhammer 40,000 is just about the most massively useful and powerful thing you can get.


If anything in Warhammer 40,000 allows you to effectively gain an extra turn on your opponent, it’s quite powerful – allowing you more options, and dealing more death, and reducing the impact of your enemy…


So when my opponents were cleverly using their transports to get extra turns on me – often costing me the game – I recognized just how strong a well-used transport can be.


Most of you who face Eldar opponents probably know at least 1 opponent who makes frequent use of transports. Transports are an amazing resource of the Eldar army, and, for the most part, are probably the strongest transports in the game. With the exception of the fact that they hover (thereby not blocking Line of Sight), Eldar transports can do everything that you want from a good transport:


- survivability

- firepower

- maneuverability

- is a tank


In truth, you probably want those things out of ANY vehicle – but the Eldar have access to many such vehicles, and at bargain prices. These 4 points about transports can each be expanded to show why you want them;


Survivability – This one should be dead obvious. If a transport can survive multiple turns, it can continue to have an impact on the game for multiple turns. If both the transport and unit survive, then after having a large impact at one point in the game, they can have a large impact AGAIN later in the game. By itself survivability is a good thing to have, but combine it with ANY other good thing about transports, and you have something great.


Firepower – This one may not be as obvious as it first appears. Any vehicle in Warhammer 40,000 wants firepower, but transports are one of the few vehicles that has to work hard to balance firepower with maneuverability. Too little firepower, and the vehicle has no function other than ferrying troops (so has next to no impact if the troops are killed). Too much firepower, and you will have to make poor decisions in whether to stay put and fire everything, or move to pick-up or drop off cargo when in truth you want to do BOTH.


Maneuverability – This must be balanced with firepower, but is an asset in any case. Fast, maneuverable vehicles with poor armour are often better than slow, pondering vehicles with lots of armour. A maneuverable vehicle can get itself (and its cargo) where you need to be, when you need to be there. It allows you freedom of tactical flexibility without requiring your strategy to force you down one road. If I’m playing an Ork army, and I have a battlewagon designed to get into the thick of things, and its bringing some boyz with it too – I have to choose between assaulting my opponent, or claiming the objective. I can’t do both, because the battlewagon simply isn’t fast enough to get into the enemy, and then get out again.


A Trukk, on the other hand (if it survives), can pick up a squad of boyz and drive them 18” in the blink of an eye.


Is a Tank – This is a yes/no style question. Some transports are tanks, and others are not. Being a tank and a transport is great, because it allows you to use tactical Tank Shock actions, and the vehicle is probably going to get close to your enemy anyways.


With all of these great things about transports, its not a wonder that of all the dirty tactics and actions that one can do in Warhammer 40,000, the dirtiest tactics of all can be accomplished with transports.


Dirty Tactic #1 – The Mobile Bunker


This tactic is one you probably already know (and if you don’t, shame on you). With the exception of a very few cases, when a vehicle is destroyed, it is not removed from the table but instead becomes a wreck. The wreck, like other terrain, will block line of sight, and provide a 4+ cover save. That’s literally like having a bunker plop down right in front of your troops.


The secret to this dirty tactic is to exploit the transport rules of where you can deploy from a wreck. Being open topped here is a great asset, allowing you to deploy anywhere around the transport. Place as many troops as you can fit within 2” of the wreck on the side opposite of the one facing the enemy. This will provide you with blocked line of sight from many enemy units (constraining your opponent’s options), and give you cover from the one or two that might see you (improving your survivability), and probably force any nearby assault squad to have to make a difficult terrain check to assault you (they may not reach, and you’ll strike first if they do).


This tactic will turn a loss into something quite less. Ork Trukks, and Space Marine Drop-Pods are AMAZING for this role – costing almost nothing, having guns and the ability to get right at your enemy fast, and altogether being worth far more than their standard points cost.


Dirty Tactic #2 – Whip-Around


This tactic effectively requires that you be open-topped and a fast vehicle. If you find yourself in a position where you don’t need to go very far to assault a unit, instead of just jumping out and charging, move to the back of the unit first and THEN charge.


In and of itself this won’t do much – but if the squad breaks and you don’t catch them, you’ll have a model within 6” of them (the transport) after they run, and so they won’t be able to regroup next turn.

If that doesn’t happen, you haven’t cost yourself anything, and may have even blocked shooting to your squad if they wipe out the defending squad just like in Dirty Tactic #1.


Dirty Tactic #3 – Pivoting Power


This one’s bad. You do this Dirty Tactic and people might not be happy with you, but it’s totally okay. When vehicles move, they are allowed to pivot as much as they want during that move. It also means that tanks can do a complete 180 degree turn on the spot at any point during the move… at the beginning, half-way through, or even at the end.


So, if you have troops in a transport, and you want to move them further but ALSO want to shoot with the transport as if you only moved 6”, then move the transport 6”, pivot 180 degrees, and deploy your troops, and move them up to the 2” maximum away from the access point.


Psychologically, when people are acting in Warhammer 40,000, they make shortcuts. One of those shortcuts is to assume that the back of a transport will stay at the back – so they might move things in a way that doesn’t keep the pivot rule in mind. As such, to them, it will seem like your troops have just moved 14” (6” move, 6” for the vehicle’s length, and then 2” from deployment from the access point). In truth, you’ve only moved 2” extra. If your troops – without the transport – were standing where the transport is, on your turn you could move them 6” up. The transport’s deployment from the access point grants an extra 2” for a total of 8”. BUT, your opponent sees the troops as standing at the back of the transport – a full 6” from where you would actually otherwise deploy them.


Effectively, all you’re doing with this tactic is punishing your opponent for making a mistake.


Also remember, you can’t RE-pivot after deploying the troops – but since you only moved 6” you CAN still shoot. That, and your troops may provide your vehicle with a cover save if they’re tall enough (most aren’t though).


Dirty Tactic #4 – An Objective Too Far


A downright obvious ability for any unit is to contest objectives, but a lot of people keep transports in the back of their mind. To most players, transports are part of a unit rather than a distinct and separate unit. For this reason, transports – especially speedy ones – make excellent objective contesters.


Once you’ve delivered your cargo, so long as your transport isn’t too threatening and stays out of reach of most guns, you’ll find that it will live much longer than it is supposed to. This is great for when the end comes, as the transport can fly in and stop an opponent from claiming an objective at a critical moment – even if there’s nothing in the vehicle.


If you DO have units still in the transport and you need to use them for this purpose, take advantage of every infantry unit’s ability to run. Blasting 12 inches, jumping out 2 inches, and then running up to 6 inches for a possible total of 20 is amazing.


DEBATE: Open Topped or Enclosed?


A big question with transports is if you want them open topped or not. Open topped is a big advantage in many ways. These vehicles can have their cargo jump out AND assault, can fire all their weapons from the vehicle (which makes it more like a mobile bunker), and has full 360 degree access and jump-out range. Take the Ork Battlewagon, for example. Normally, to do Dirty Tactic #3 (pivoting) you’d have to spin the Battlewagon around for the boyz to get out. However, since the Battlewagon is open topped, your infantry can disgorge out the front! Sure there are no access ramps there, sure it’s not iconic, but it is allowed. Also, that 360-jump-out means its very difficult to kill a squad that’s being forced to disembark, as they can disembark anywhere.


However, there’s a big risk that you take with open topped as well. You take a MASSIVE +1 penalty to the damage table. That means that, whereas other vehicles have only a 1 in 3 chance of being destroyed by a penetrating hit, you have a 1 in 2 chance. That’s a sizable leap. Also, on penetrating hits you are guaranteed to not be moving or shooting next turn – not just being unable to shoot. Finally, and most importantly, Glancing Hits can kill you! Sure it doesn’t happen often, but when it does it’s a big pain. That means that even a basic Tau Fire Warrior shooting his Pulse Rifle at your Armour 11, or that Chaos World-Eater that’s charging you (hitting your back armour of 10), are all major threats to the guys inside.


At the end of the day, it comes down to what you’re using the transport for. If the transport is there to ferry around a squad that’s there to hold objectives and shoot weapons, an enclosed transport is probably the best way to go. It’ll survive longer for when you need to relocate again, can protect its cargo better on the way there (or after drop-off using Tactic #1), and can tank-shock squads that don’t have an anti-tank weapon without fear.


If, however, you using it for transporting an assault squad, open-topped is by far the better option. The cheaper this transport is, the better, as it’ll save points on the rest of your army. Stay focused and remember that this transport is just a shield for the troops inside.

Monday, July 12, 2010

Snazzgunz: Counter-Charge, Feel No Pain, and Fleet


Welcome back to Snazzgunz! Today I’m going to tackle 3 more Universal Special Rules. Each of these rules today is well-known for their massive power to affect the game. One of these rules is a little obscure, another can be found in almost every army, and another has gained more and more popularity since its redux into the 3rd Edition rulebook, where it has gone nigh unchanged in the way that it works.


The first I’m going to tell you about is the mainstay of the Space Wolves Space Marine Chapter. This Universal Special Rule has recently been somewhat downgraded in the most recent edition of the rules, with one of its biggest strengths now being relegated to the entirety of the game – Counter-Charge.


Counter-Charge used to be everything you wanted out of the Space Wolves. The Space pups were feared and respected for it. The Space Wolves were a close combat army with no real weaknesses against other close combat armies. It didn’t matter whether you charged them, or they charged you, they always had max-attacks. In fact, if anything, it was scarier to charge them, as squad-coherency rules meant that they would almost always get everyone into combat.


Before 5th Edition, when you charged an enemy squad, they were stuck like they last moved. So if the squad was spread-out and you charged them on their side, you’d face a hugely reduced number of attacks back against you than if you charged head-on. Not so with the Space Wolves, who’d get to charge you back.


However, now that every army does this, the only benefit you get from Counter-Charge is the “mere” +1 Attacks for charging. This is still very powerful, but now is less threatening than it used to be.

Counter-Charge currently is only available to scant smattering of units in the game, most-notably Space Wolves. However, since becoming a Universal Special Rule, you’ll start noticing this ability creeping its way into other armies as well (having already gotten into the Tyranid Codex, and I believe Blood Angels codex, but I might be mistaken).


When playing with units that have Counter-Charge, carefully determine where the unit will receive maximum benefit. Remember, it’s an ability that’s dependant on your opponent charging you. The best place to be with a unit with counter-charge is in cover, as to maximize the attacks back. Set up situations where your opponent is in a bad position either way. If they go to charge you, they’re charging through cover and you get to attack first with your whole squad. If they decide not to charge you, they’ll leave themselves open to being hit where they’re weakest.


When playing against units with Counter-Charge, remember the impact that charging through cover will have. Charging a counter-charge unit with 2 units is a good way to minimize the impact of counter-charge. Counter-Charge is at its best when it gets used to maximum effect every time, so throwing in your units piece-meal means that they’ll get to maximize how much damage they do.

Also, try whittling down their squad’s numbers. The larger the squad is, the greater the bonus from the counter-charge. If you can reduce a squad by 3 models before charging, that’s at least 6 attacks you don’t have to deal with (possibly 9 attacks).


The next special rule I’ll be covering today has been gaining lots of popularity, to the point that most armies in Warhammer 40,000 now have access to at least 1 unit that grants this most powerful of special rules; Feel No Pain.


Feel No Pain grants any infantry model a half-chance to survive most attacks. Although it can’t stave off the strongest attacks like an Invulnerable save can, it works like how many people feel Invulnerable saves should work. First you get to save, then you get to Feel No Pain – in effect, giving you a second save. What’s even better is that this second save can be taken against most attacks, even ones with a High-AP value.


Effectively, Feel No Pain turns any Warhammer model into James Bond's arch-henchman, Jaws - they can ignore wounds that would often be fatal to most mortals. This means the answer to “Jimbo! You’ve just been shot three times in the heart! Are you alright?” could be “Just dandy, thank you very much!” (or, continuing with Jaws, "Urgh").


Often Feel No Pain is granted upon a unit due to the presence of a special model in the unit, like a Mad Dok or an Apothecary. However, due to the way shooting and close combat works, you will rarely be able to assign damage to those individuals.


In most cases, if you can give a unit Feel No Pain, it will be beneficial to do so. If they have this special rule, they can wade into massive firefights against basic troops and come out the other side no worse for wear. Remember, if you have Feel No Pain because of an additional model to the unit, maximize on the number of models in the squad. The more models you have, the cheaper the per-model cost of the Feel No Pain! (50 points spread amongst 5 models is 10 points per model, 50 points spread amongst 10 models is 5 points per model – a massive discount!)

Both for when using Feel No Pain or when fighting against it, you MUST remember how to get around it! Effectively, it works just like the Necron’s We’ll Be Back special rule. If you wound the model with an attack that instant-kills (strength double toughness) or that ignores armour saves (no from AP value, but from being something like a Power Weapon), then they won’t receive the bonus roll. That means if your unit has Feel No Pain, avoid opponents with power weapons, and use the squad to sweep through enemy Troops.


If, however, you’re fighting against this unit, the best weapons to use are high-powered ranged attacks. Chances are the Feel No Pain unit is a close-combat beast anyways, and you’d need your own close combat beast to fight them off. No where is this more apparent than when dealing with a squad of Nobz. Nobz, having 2 wound each, get double-duty out of Feel No Pain! Getting into close combat with them is already a bad idea. You almost must deal with Nobz by shooting them with high-powered weapons. A nice big fat piece of Ordnance is probably the best way to go, but throwing Missiles and Lascannons at them wouldn’t hurt either.


Finally, this brings us to the last Universal Special Rule I want to cover today. This one is massively popular with Games Workshop right now – and for good reason! It’s something that’s very flavourful that really fits the logic of the game – Run’s older brother, Fleet.


Run is a great type of special movement, and is wholly based off of Fleet. Instead of shooting, an infantry unit (including Walker vehicles) can “run” an additional D6”, ignoring cover along the way. I think one day I’ll need to cover Run all by itself to give it the attention it deserves, but for now I’ll stick with Fleet.


I have a theory as to how Run was created, and it goes like this:


------------------------------


Andy Chambers writes to Gav Thorpe:


“Hey Gavy,


I was just winging my way along piloting the creative for Starcraft 2, when I felt I should take pity on you and throw you a bone. Remember that whole “Fleet” rule we started to give to everything back in 3rd and 4th edition? Well, next time you make a new edition, why not give Fleet to every unit?


Wishing you well,


- Andy “Coolio” Chambers”


Gav, his face painted red from being upset (and envious) at Andy, couldn’t help but feel that Andy was right. Fleet was a great special rule that allowed close combat units to get in faster with the enemy, and didn’t break the game. It also allowed shooters to move quickly to better set up. Giving every unit Fleet started to seem like a natural thing to do.


Gav walked in to Games Workshop Head Office in Nottingham and pitched the idea. 4th Edition was starting to get a little dry again anyways. Some folks said they should go ahead first and get the new Dark Eldar Codex out of the way, but once Gav pitched the idea to everyone, a light when on. Everyone realized the potential that this opened up. Instead of bogging the game down in endless special rules, why not simplify things and speed up the game by allowing practically everything to simply move faster?


5th Edition had its start, and that was Fleet. But a problem was starting to show up.


Fickle as he is, Andy Chambers had laced the amazing suggestion with a double-edged poisoned sword. If Fleet were to be given to every unit, it would destroy two things that players held dear.


First, it would allow every close combat army to get into close combat way too fast. It was okay for some units to get in that fast, but not all of them. But if they didn’t allow for such an all-encompassing rule, a massive overhauling and editing of unit-entries would have to occur to either give every sane unit Fleet, or give every insane unit something that prevented Fleet. Neither seemed the best option.


Secondly, giving almost every unit Fleet would take away the specialness of every unit that already had Fleet. The flavour of Fleet was something that was entrenched in the Eldar, and had also starting making some deep roots in the Tyranids as well. Giving everything Fleet meant that Eldar and Tyranids would need something that made them even faster than other armies – and that kind of speed would be too difficult to balance.


Gav was about ready to throw the whole thing out the door. Dark Eldar would get their new codex, and the Inquisitional forces would again get an overhaul. So many armies could get updated again that they could stretch out 4th edition like they did 3rd, and any new bright ideas could again be implemented with a “4.5 edition” article in White Dwarf, despite the confusion that brought upon those without a subscription.


Just then, Jervis Johnson broke through the door like a mighty Dwarf swinging a battle axe. He cried from the top of his lungs, “AND SO IT WAS SAID – MOST CAN RUN, BUT ONLY FEW CAN FLEET!”


This great announcement nearly broke the building in two, and seismologists halfway around the world in Australia noticed a small ripple appear on their instruments.


Now it was clear. Every infantry model could Run, but units that had Fleet would still have something over the models with run. It was instantly apparent what it had to be. Gav said allowed, “Units that Run can’t assault, unless they’re Fleet”. In this way, units with Fleet stayed exactly as they were. Other benefits could be given later if it was deemed necessary, but the core was there. If a unit were to Run, then that would be all it did. They wouldn’t be fast enough to still charge afterwards, but they didn’t just stand around doing nothing either. A unit with Fleet though, just like before, was faster. They could Run, but they could still charge after that run!


And so 5th edition was back on track! Gav Thorpe had shown up Andy Chambers by taking his poisoned suggestion, and then turning it into aqua vitae!


The end.


---------------------


Fleet is a great rule to have, and when you can reach an opponent 18” away from you in 1 turn, it can have a huge impact on the game. When using it, just remember to not rely on it. Fleet is a random roll, so you could move 6” or you could move 1”. Just remember not to use it in a way that leaves you out in the open. On average you’ll make it 3.5”, so only assume it will work if all you need is an extra 3 inches out of it.


When working against Fleet, just remember how it modifies the way movement works. Your opponents may look far away now, but that distance can be closed extremely quickly. Keep the distance in mind. If they would need 6” to get to you, then you’re likely safe, but still probably too close. Let you opponent forget how far away their fleeted units are from the rest of their army, and let them chase you a bit, stretching themselves out. It’s far easier to deal with units piece-meal than it is to deal with them all at once.


That’s it for today! Next week I’ll FINALLY cover some of those Dirty Tactics you’ve been waiting for!

Tuesday, July 6, 2010

What Is Random?


What is random chance? What does it really mean that a dice has 6 perfectly equal sides, or that you have a 66.66% chance, or that a dice encountered interference?


Randomness pervades our lives. Things happen on a daily basis that we cannot explain, and thus we attribute the event to being “random”. Like what time does the bus arrive at the bus-stop when you go to school? You know that it’ll come around a certain time, but it’s rarely exactly on time – often being a little early, or a little late.


We would call the exact time that it arrives at a completely random event – because we have no influence over it.


However, that’s not exactly true. The time the bus arrives at ISN’T random at all, in fact. The time it arrives at is completely predicated by the events leading up to the exact time it picks you up. The bus driver woke up and left for work early, but then encountered heavy traffic. The first two bus stops were emptier than usual, but the next two were a bit more packed. He stopped for a quick coffee later, but then went a bit faster than normal to make up the time.


You could argue that the different circumstances leading up to each event were random, but they aren’t either. All have a basis in the actions of people. Someone decided not to go to work and take a holiday, another person took a later bus, road-construction slowed down traffic, etc.


The roll of a die too is a perceived, but false, random event. The way you cup your hand, the force put behind the throw, the smoothness of the table, the Rhino the die bounces from. If you had a strong enough computer, and accurate enough cameras to record the exact conditions immediately after the throw, before the die has touched anything, you could predict and determine how (and where) the die will land. It’s simple physics really.


For this reason, many physicists and mathematicians have been trying to discover something truly random – and its hard work! If anything, it’s so hard because Physics as we know it implies cause and effect. One event leads to another. If I drop a ball, I KNOW it will fall downwards. In the same way, even at especially small scales, where more and more apparently truly random events are occurring, we still can say with certainty that if one thing happens, so will something else.


A great example of this is the decay of a single atom. Normally decay rates are very easy to predict. An object will lose a certain % of its mass to decay in a given amount of time. For example, Radium has a half-life of 1602 years, meaning that in one thousand, six hundred and two years it will lose half of its mass (decaying into Radon gas). At masses of trillions of trillions of atoms of radium, this exercise is very predictable – so predictable that you can ascertain how old the radium is if you know how much there was at the beginning and how much there is now.


However, individual decay rates are a % chance that a single atom will decay at any given moment. Just like the school bus, you know roughly when it will, but not exactly when – sometimes it’ll be early, and sometimes it’ll be late. However, when you repeat the process a hundred thousand million times, you arrive at an average that will likely apply VERY CLOSE to the next hundred thousand million times. But it is still POSSIBLE that the entire bar of radium could go poof all at the same instant, or that it practically never decays.


The decay of a single radon atom is like that kind of situation. It could decay at any moment, and in truth you really can’t predict when. It could be one of the atoms that decays today, or it could be one that won’t decay for another 50,000 years. You can only give a percent chance that the particle will decay within a given time.


And even this, like the school bus, is not really random. As electrons and neutrons and preons and muons all fly around subatomic space, they’ll be hitting each other. At a large enough level it seems to be random, but it isn’t.


At the end of the day, true randomness is impossible, and all we can function on is perceived randomness. The less you can control the outcome of a die roll, the more random it is. So the next time your die rolls off the table, let it finish rolling – it’s actually more random now since you didn’t anticipate it going off the edge.

Monday, June 28, 2010

Cheating


Warhammer 40,000 is a game – and like all games, there will be those who will feel the need to cheat. In a game like Tic-Tac-Toe, it’s easy to spot a cheater, and easy to spot a mistake. If someone puts down an extra “O”, you’ll probably see them do it, and the symmetry of the game will be thrown off (there’ll be more “Os” than “Xs”, which is impossible).


However, as a game becomes more and more complex, and has deeper and deeper layers of play, cheating can become more and more difficult to spot and differentiate from making a mistake.


Take this classic cheating move:


Model A, the furthest up model in a squad, starts 13” away from an opposing squad. After moving, however, you find that he’s within 6” assault range. The model somehow was moved up 7” instead of 6”.


The Base Jumper:

Most Commonly: New Player

Reason for Cheating: Didn’t know – Stretching the Rules

Chances of Rehabilitation: Good


The Base Jumper measures the distance to move from the front of his base, but then moves the model up to that point so the back of the base touches. Nearly 1” is gained. The Base Jumper may not even realize that they cheated – they may be thinking of it as a clever way of bending the rules.


Corrective action must be taken immediately to teach them the correct method of measuring distances from models. Usually the Base Jumper learned this mistake from a friend. If someone more experienced is doing this, though, they are trying to exploit your unawareness to gain an advantage, and then it’s truly cheating. If they try to argue it, direct them to the rulebook, it actually shows a visual representation enforcing the correct way to move models.


Warhammer 40,000 is not a computer game. There is no system that forces a game state upon players. It’s not a Magic or Poker Tournament either, where a judge watches over everything and ensures that the proper game state is maintained should a blunder be made. No, at its core Warhammer 40,000 is a casual format where the players must be their own judges.


Which brings us our next villain…


The Rules Lawyer:

Most Commonly: Experienced Player

Reason for Cheating: Win by a thousand pin-pricks

Chances of Rehabilitation: Moderate, Good with group support


The Rules Lawyer is a gamer who seems to know every rule, backwards and forwards. They despise taking out the actual book, and claim that the rules support all of their actions, and then take a fine-tooth comb to everything that you do and argue the same thing back. A great example would be Line of Sight. They’ll argue to death that the current “any part of the model is visible” rule means, for them, that they can effectively shoot your entire army – and yet at the same time will flat out deny and force a “Hand of Fate” roll to see if practically anything you have can see him – and if you can, you can bet he’ll push for 3+ and 4+ cover saves as much as possible, while you’ll get 4+ and 5+ saves in return. The rules lawyer is kind of like the Joker – he forces you to have to become something you’re not, a rules expert. However, there’s another way out. Become part of a larger gaming group that supports the actions and rules you want to take. Since Warhammer is a casual format, house-rules are a great way to settle situations that you might find odd or out of place (myself, I still love Area Terrain, since the board – to me – is simply a representation of the game state, and can never perfectly depict how the terrain really looks).


So how do you identify the cheater? It’s very difficult in Warhammer – in part because a lot of this game is occurring simultaneously, your attention may be diverted, and you may not remember the rule that’s being broken.


With cheaters, it’s like playing a game of ball-and-cups. If you miss their move for a moment, they can pull a fast one on you. I guess this is a good time to bring up the most common of all cheaters…


The Dice Master:

Most Commonly: Anyone

Reason for Cheating: Tactical Advantage

Chances of Rehabilitation: Low


The Dice Master is perhaps one of the most nefarious of all the Villains. The Dice Master is a true illusionist. While your attention is focused elsewhere, they will pull a fast one, and before you know it – a losing dice roll is now a winning dice roll. Most often this is when the opponent’s back is turned during a die roll, and they’ll just shift the die so that it succeeds rather than fails. They may also pick up failed rolls when a lot of dice are rolled, preferring to roll next to additional dice already on the table to effectively gain more rolls. The worst ones, and the ones easiest to spot, are the ones who roll a bunch of dice, and then effectively “hide” the results by scooping them up faster than you can really see them, or who roll behind something so that you can’t see how much was rolled. The only way to defeat the Dice Master is to be vigilant at all times – but you can still be friendly when doing this. Stand beside them, enjoy the excitement of the dice-rolls, and make sure they’re always present for YOUR rolls so that you create the atmosphere that EVERYONE must be present for ALL rolls.


The crux of stopping all cheating though, is to nip it at its bud. Don’t let it slide. Create a gaming atmosphere where cheating simply isn’t tolerated. If the Rules Lawyer is creating a problem, get the whole group to enforce some simple house rules. Having someone who really knows the rules truly very well is excellent to have – but don’t be afraid to deviate from the book if you want! My group allows you to ask what a squad is carrying, and motivates people to openly acknowledge confusing conversions or proxies before a game starts without prompting. At the same time, I know another group that is the polar opposite to this – keeping all information hidden at all times. Neither is truly right or wrong, but neither group would appreciate the pressures the other puts on them (one side thinking its unfair to give the opponent more information than they would actually have, and the other thinking it unfair NOT to give the information on something to avoid cheating).


Oh… one final Villain…


The Pariah:

Most Commonly: Unknown

Reason for Cheating: Extreme Ambition and Lack of Morality

Rehabilitation: Pariah status if ever caught


The Pariah brings the worst form of cheating imaginable in a dice game – tampering with the dice to make them rigged. There do exists methods for doing this – from weighing dice (drill holes in the side opposite of the one you want to land, fill with lead, paint overtop) to misshaping them (heard a rumour of melting them in a microwave or oven to just barely make them slightly rectangular). You can tell a Pariah by the fact that they reserve special “lucky dice”, that they never use any dice but their own, and never offer to let you use the lucky dice. Proving it is a different matter, and one I’ve thankfully never had to do.


If you catch the Pariah, denote them the Pariah status and never game with them again. Teach them that cheating this bad is the lowest a person can go (most effort to cheat, high effect, impossible that they did it by accident, hard to catch them again in the future, most likely to use rigged objects in other games). If you ever do find this villain, punch them in the face for me.


Hope this helps you identify future villains!


(PS. Note, I do run a Dirty Tactics article. Dirty Tactics might not win you any friends, but they are completely legal actions that do not even stretch the rules. What they do allow, however, are actions for best effect that, although perhaps not realistic, are 100% legal and highly effective.)